GitLab offers a private NPM registry for each project with the GitLab Packages feature.
We will see in this article how to use it to publish modules then how to automate the releases and the changelog generation on a project.
Requirements
You will need an existing NPM module project.
First step : package.json update
Add a main entry in the package.json to declare the module entry point.
"main": "src/index.js"
Then, add a publishConfig object.
"publishConfig": {
  "access": "public"
}
⚠️ Important : You can also need to update the project name if the scope (GitLab group) is missing.
Why ? GitLab Packages use the project GitLab group as NPM scope.
Example :
The project module ziggornif/awesome-project project will be declared as @ziggornif/awesome-package
Your project is now well configured to be published in the GitLab NPM project registry.
Configure CI
Now, we can set up a CI pipeline which will publish the module versions.
In this example, we will create only one release stage that will be triggered on the main branch.
Create a .gitlab-ci.yml file in the project.
default:
  image: node:16
  before_script:
    - npm ci --cache .npm --prefer-offline
    - |
      {
        echo "@${CI_PROJECT_ROOT_NAMESPACE}:registry=${CI_API_V4_URL}/projects/${CI_PROJECT_ID}/packages/npm/"
        echo "${CI_API_V4_URL#https?}/projects/${CI_PROJECT_ID}/packages/npm/:_authToken=\${CI_JOB_TOKEN}"
      } | tee --append .npmrc
  cache:
    key: ${CI_COMMIT_REF_SLUG}
    paths:
      - .npm/

workflow:
  rules:
    - if: $CI_COMMIT_BRANCH

stages:
  - release

publish:
  stage: release
  script:
    - npm publish
  rules:
    - if: $CI_COMMIT_BRANCH == $CI_DEFAULT_BRANCH
Explanations :
- The default part install node modules from cache (if exists) and setup
.npmrcfile to publish module - The publish job declared on the release stage run the publish module action
- The pipeline is only triggered on
mainbranch commits.
Let’s publish a version !
With this configuration, every commit on the main branch will trigger a pipeline like the following :
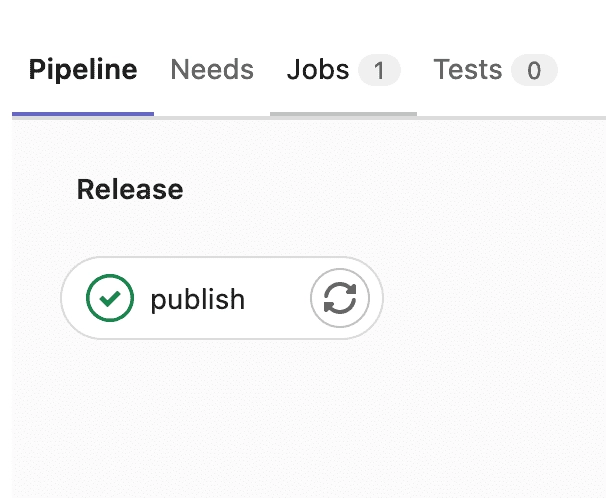
We can see that the publish job works well. The version is published in the GitLab project package registry.
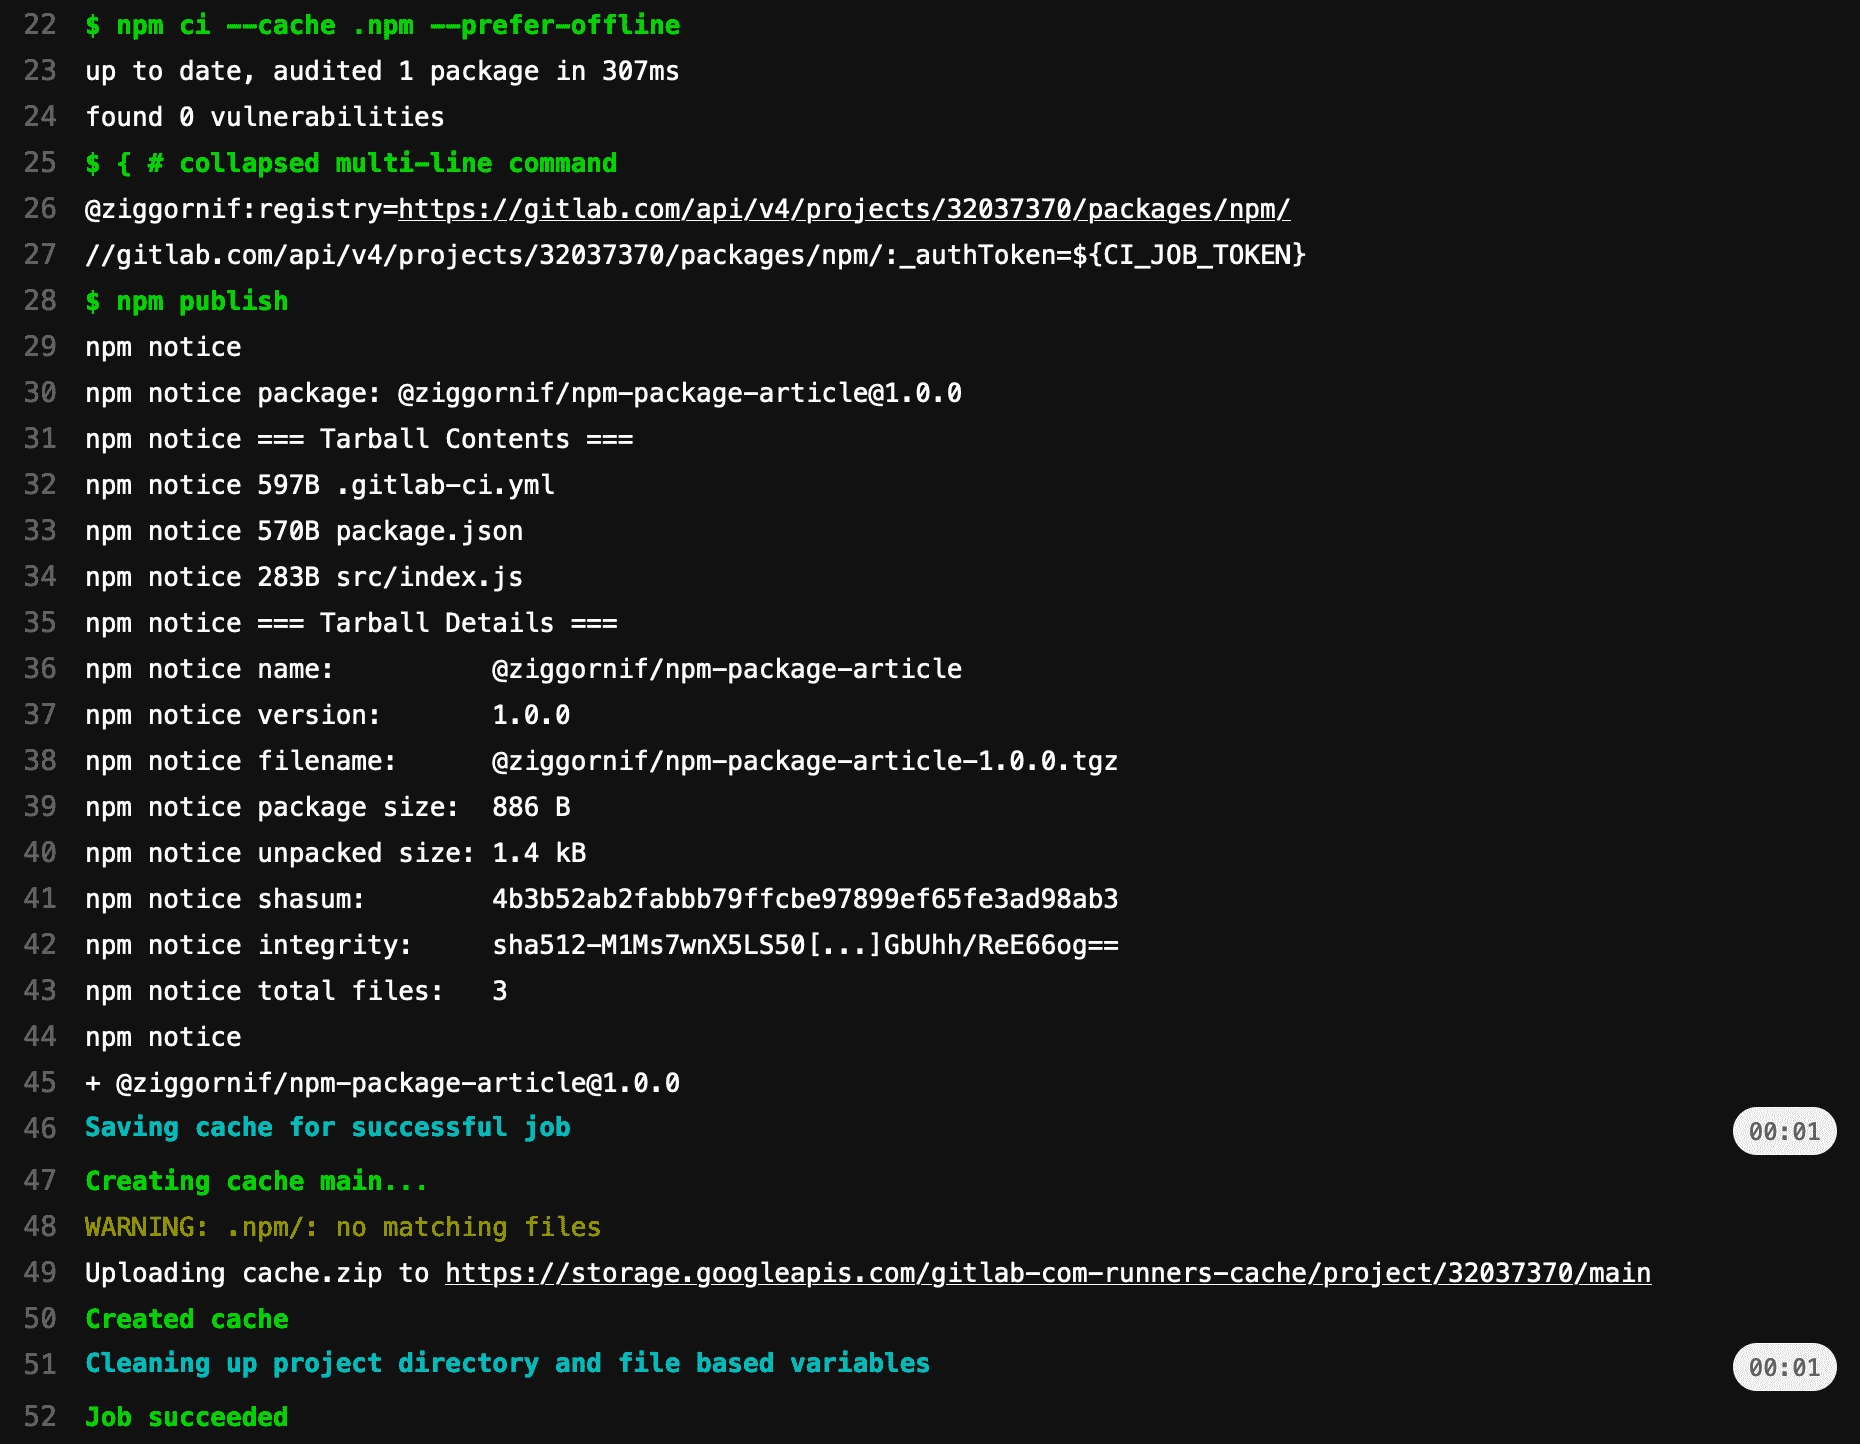
@ziggornif/npm-package-article@1.0.0.
Retrieve published versions in GitLab
Now, go to the package registry page (left side bar).

You should now have a new entry in the package page.

@ziggornif/npm-package-article that we have published with the CI in 1.0.0 version.
If you click on the version entry, you will retrieve the build information and the registry setup to use the module in your projects.
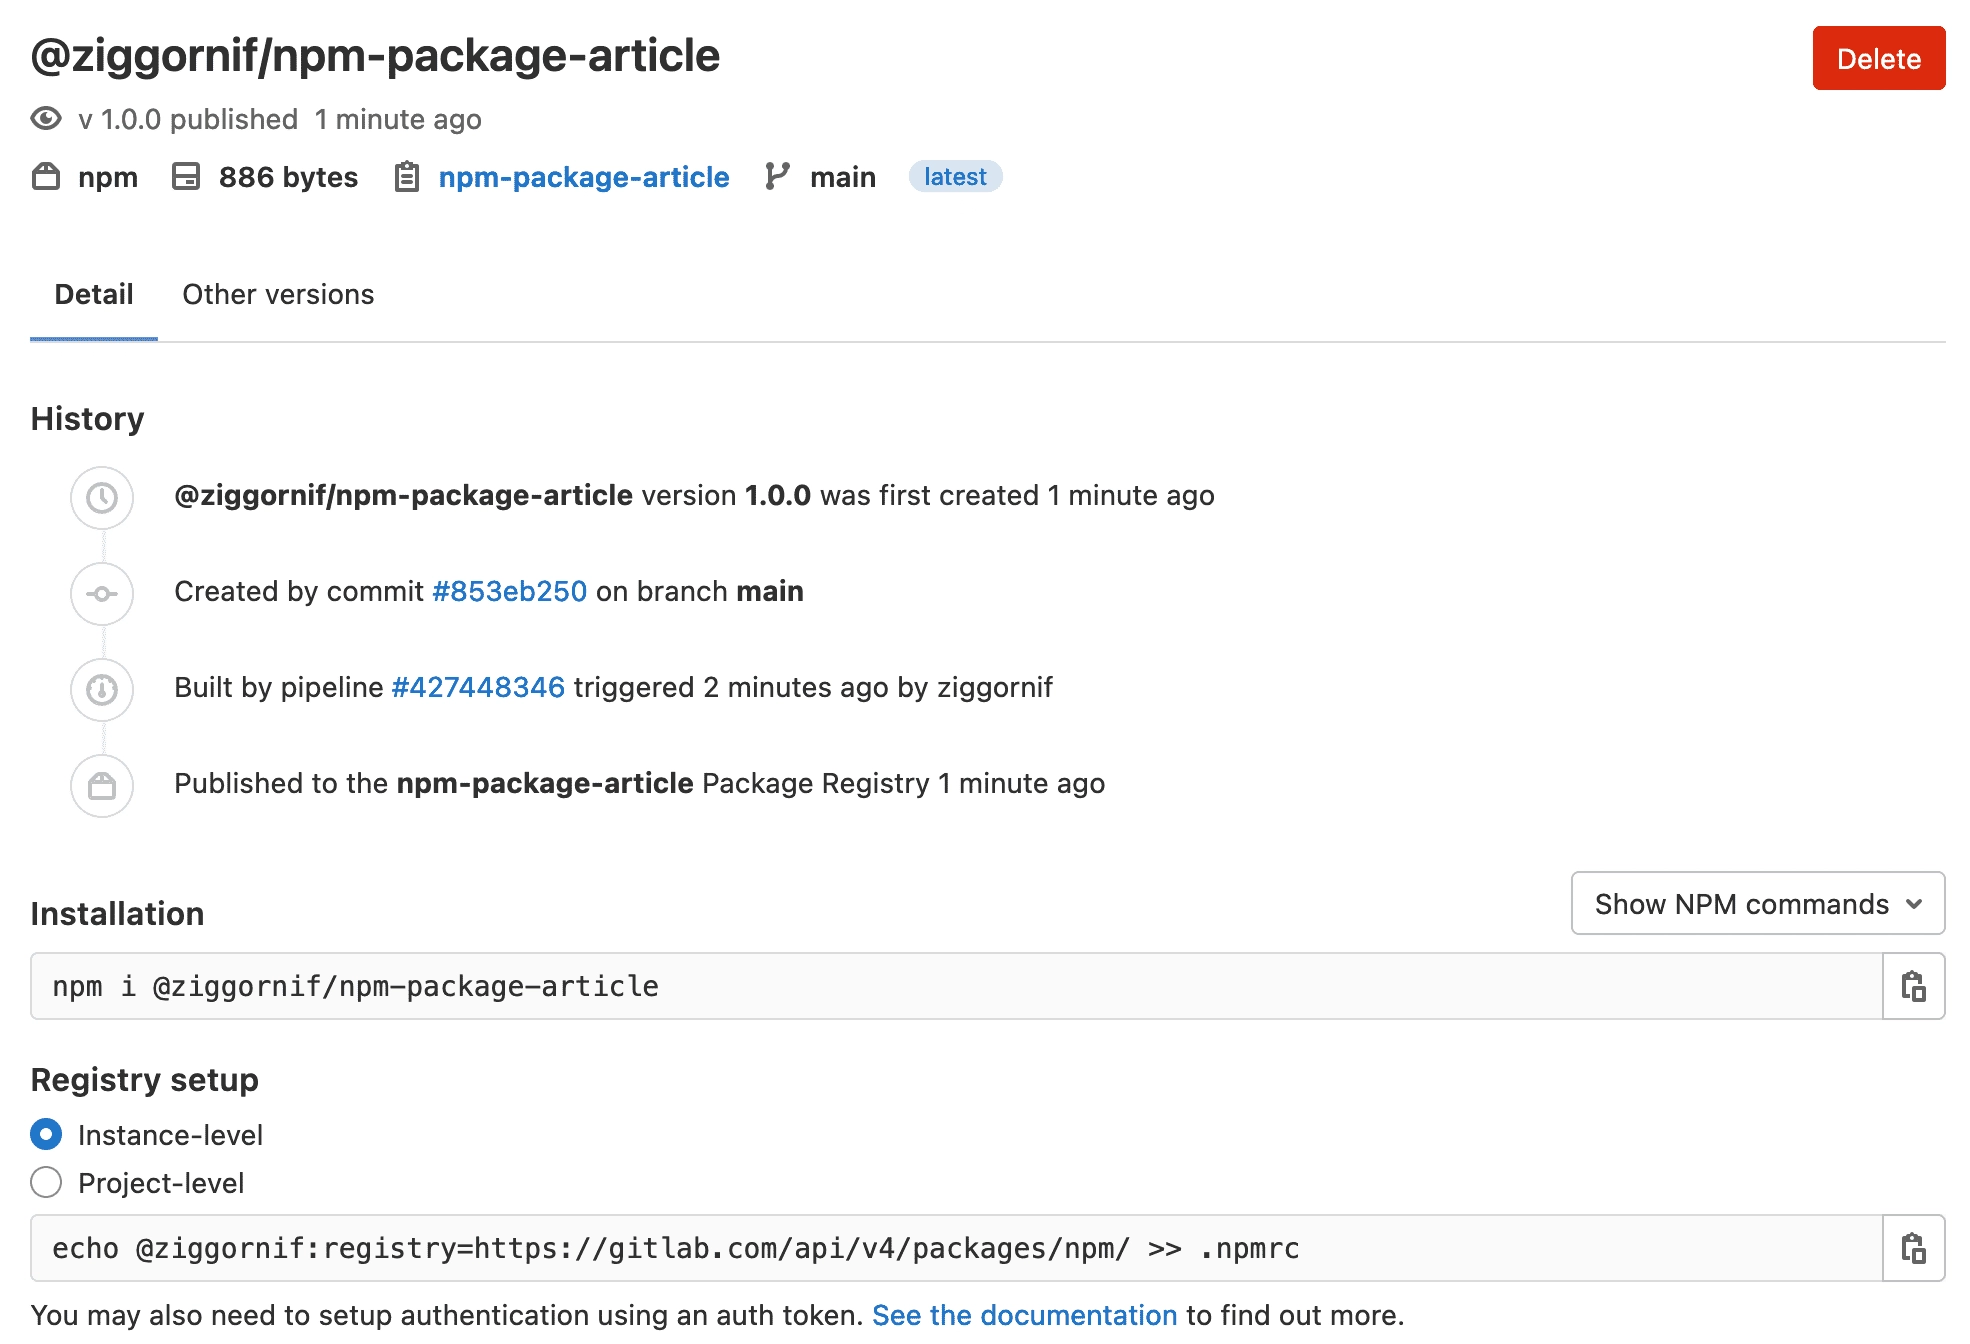
npm i @ziggornif/npm-package-article
and to add the gitlab registry in a JS project :
echo @ziggornif:registry=https://gitlab.com/api/v4/packages/npm/ >> .npmrc
Releases and Changelog automation with semantic-release
Our project can now publish its versions to the GitLab package registry, but we still need to set the version by hand.
Let’s automate this with the semantic-release module.
Reminder on conventional commits and semantic versioning
The semantic-release module automates the package releases and apply semantic versioning based on conventional commits.
The semantic versioning (SemVer) rules permit to define the next software version.
- A fix will be a patch version 0.0.x
- A feature will be a minor version 0.x.0
- A breaking change will be a major version x.0.0
Conventional commits specification permit to associate a commit type to a semantic versioning rule.
fix:commit will produce a patch versionfeat:commit will produce a minor versionBREAKING CHANGE:commit will produce a major version
Install semantic-release and dependencies
Run the following command to add semantic-release dependencies :
npm install semantic-release @semantic-release/git @semantic-release/gitlab \
@semantic-release/npm @semantic-release/changelog --save-dev
Theses dependencies are needed to configure semantic-release with Gitlab and generate the changelog file.
Configuration
Create a .releaserc in the project with the following content :
{
  "branches": ["main"],
  "plugins": [
    "@semantic-release/commit-analyzer",
    "@semantic-release/release-notes-generator",
    [
      "@semantic-release/changelog",
      {
        "changelogFile": "CHANGELOG.md"
      }
    ],
    "@semantic-release/gitlab",
    "@semantic-release/npm",
    [
      "@semantic-release/git",
      {
        "assets": ["package.json", "CHANGELOG.md"],
        "message": "chore(release): ${nextRelease.version} [skip ci]\n\n${nextRelease.notes}"
      }
    ]
  ]
}
Update package.json
In the package.json file, add a semantic-release script :
"scripts": {
  "semantic-release": "semantic-release"
}
Update CI Pipeline
In the .gitlab-ci.yml add a NPM_TOKEN variable.
variables:
  NPM_TOKEN: ${CI_JOB_TOKEN}
Then, update the publish job command.
script:
-    - npm publish
+    - npm run semantic-release
Setup CI/CD variables
Create a personal access token with API scope from your profile page (see GitLab documentation : https://docs.gitlab.com/ee/user/profile/personal_access_tokens.html).
Go to Settings -> CI/CD pages to define a private variable.
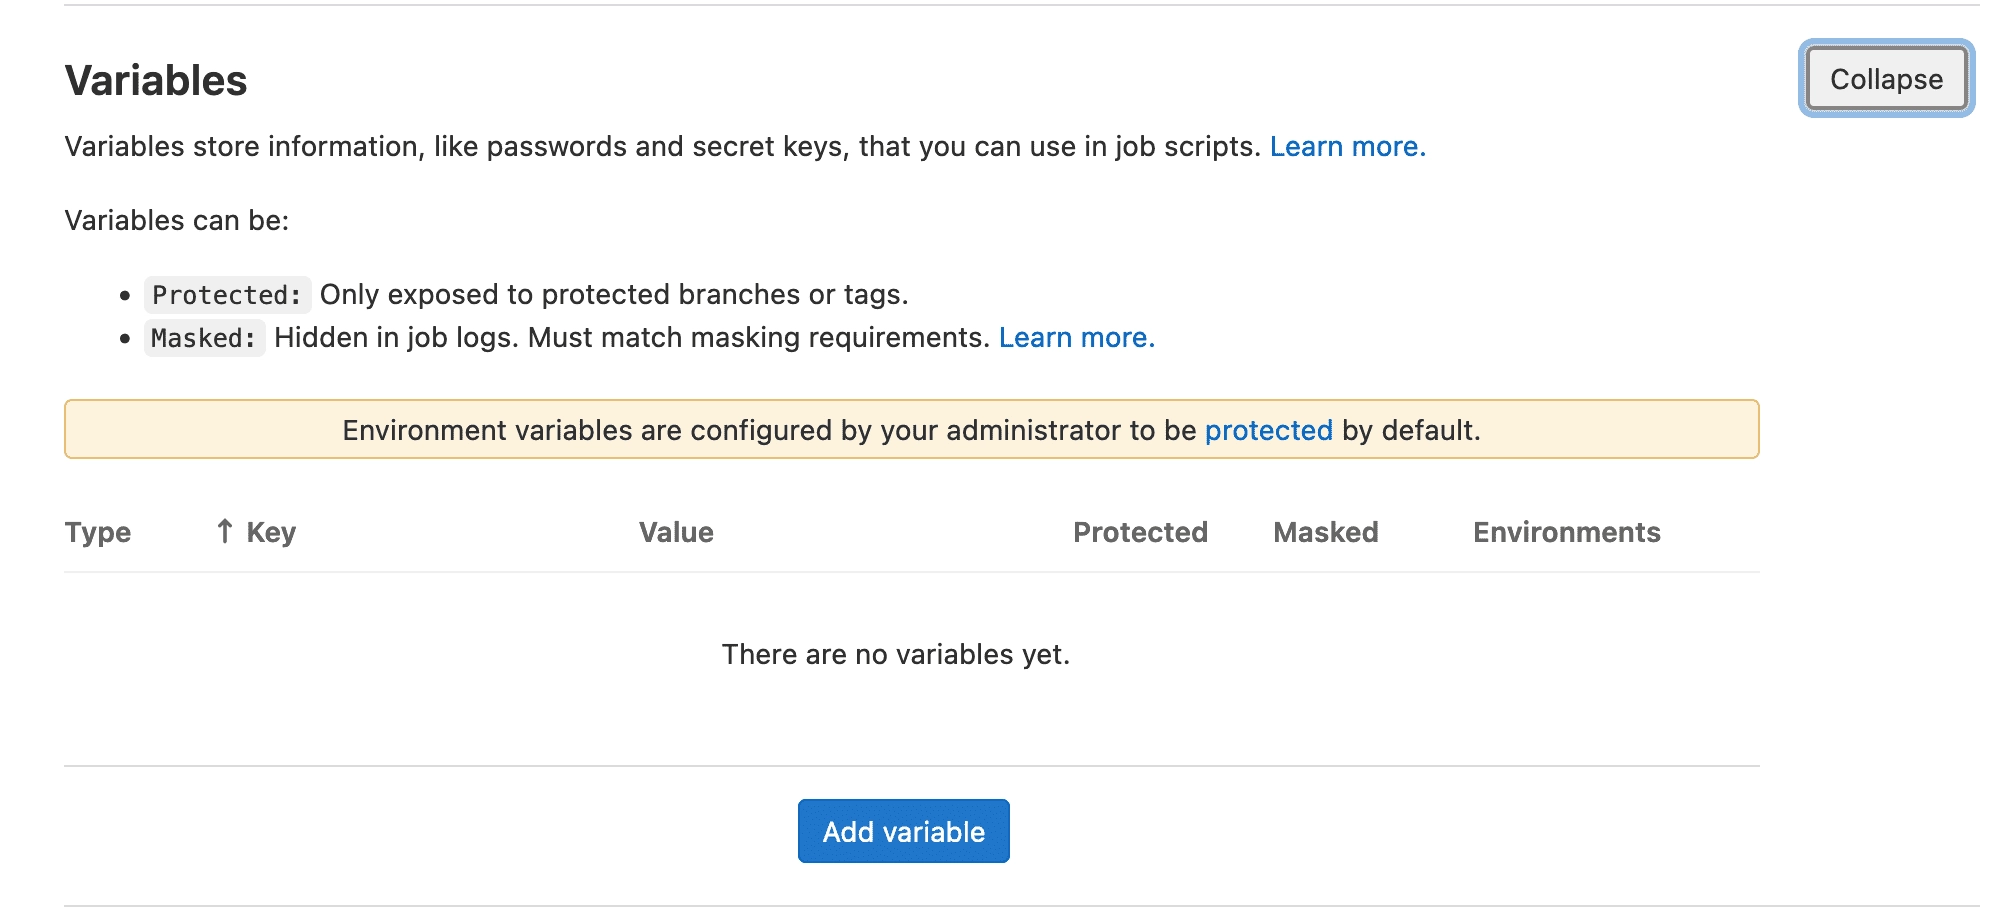
In the Variables section, create a variable named GITLAB_TOKEN with the previous generated token.
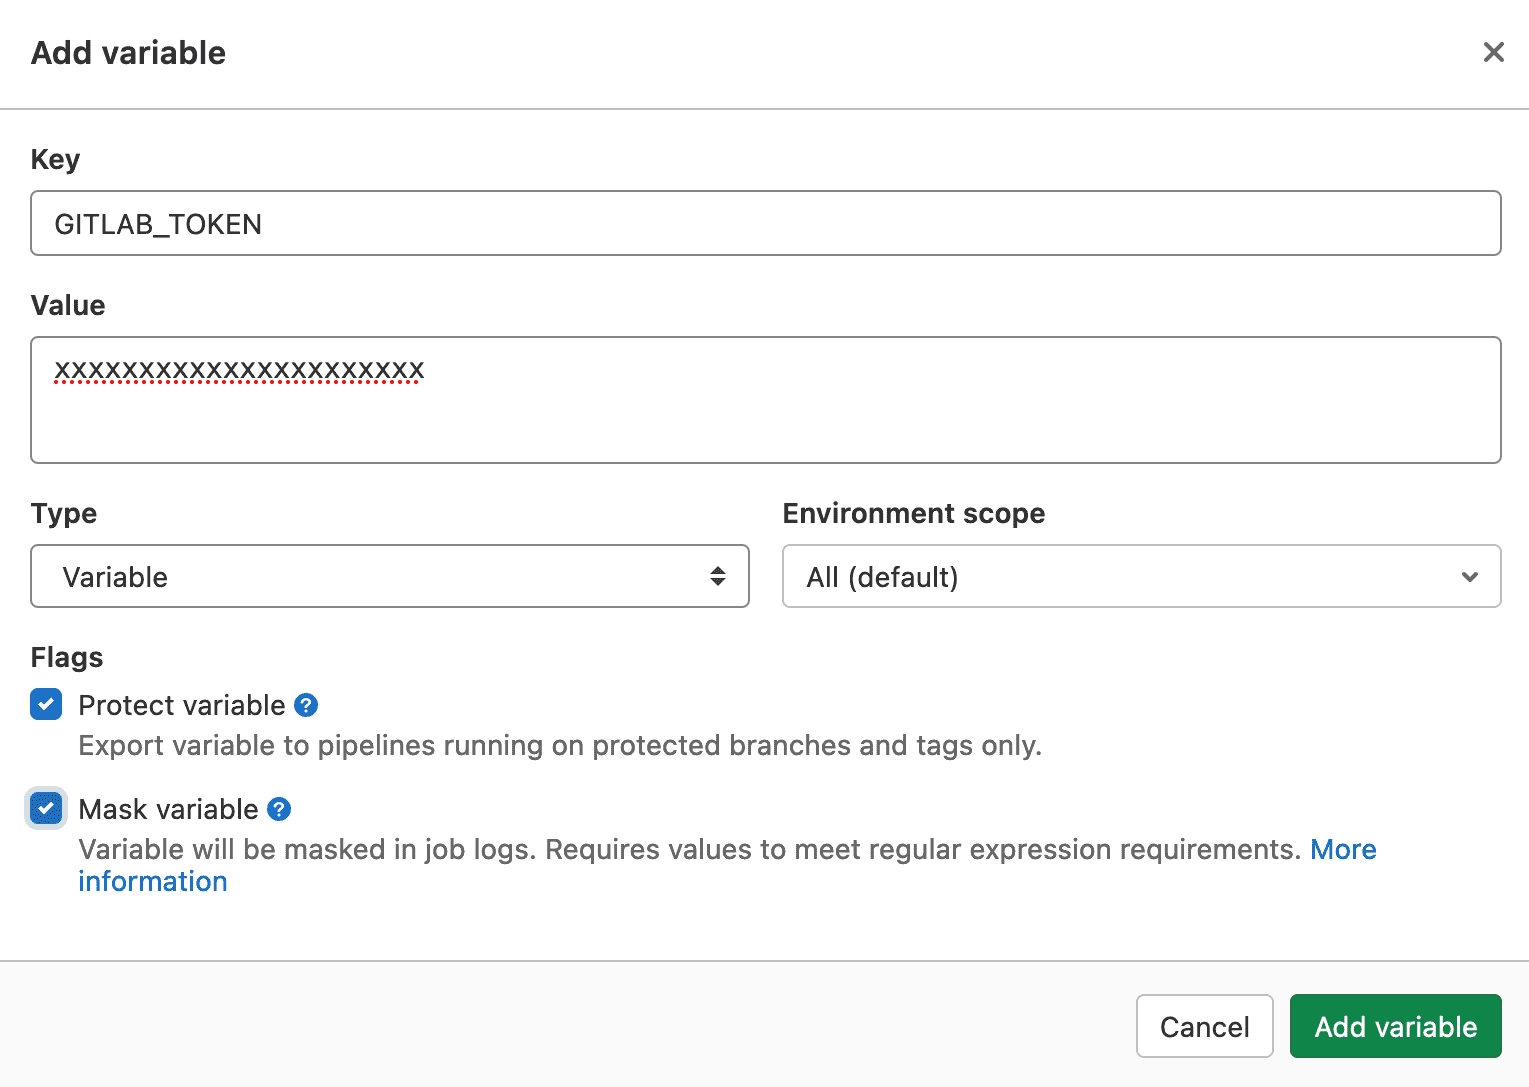
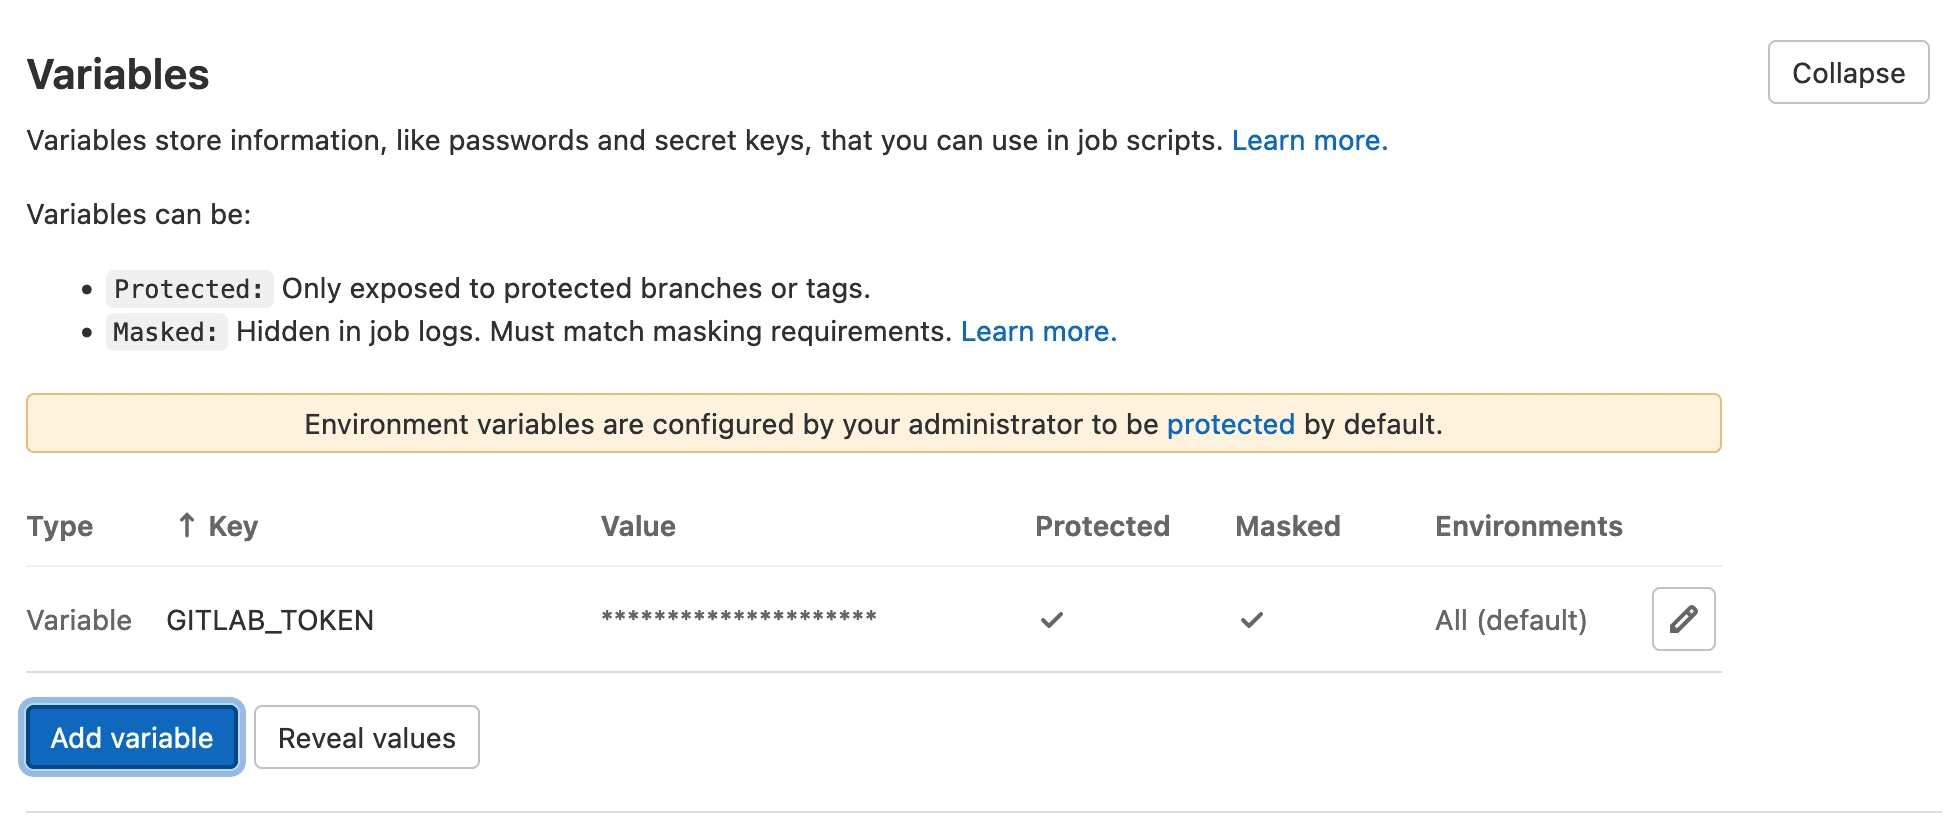
This variable will be used by the semantic-release module.
Release time !
Add a feat commit on the project and let the magic happens.
We can the that the semantic-release module pushed a release commit and a new tag.
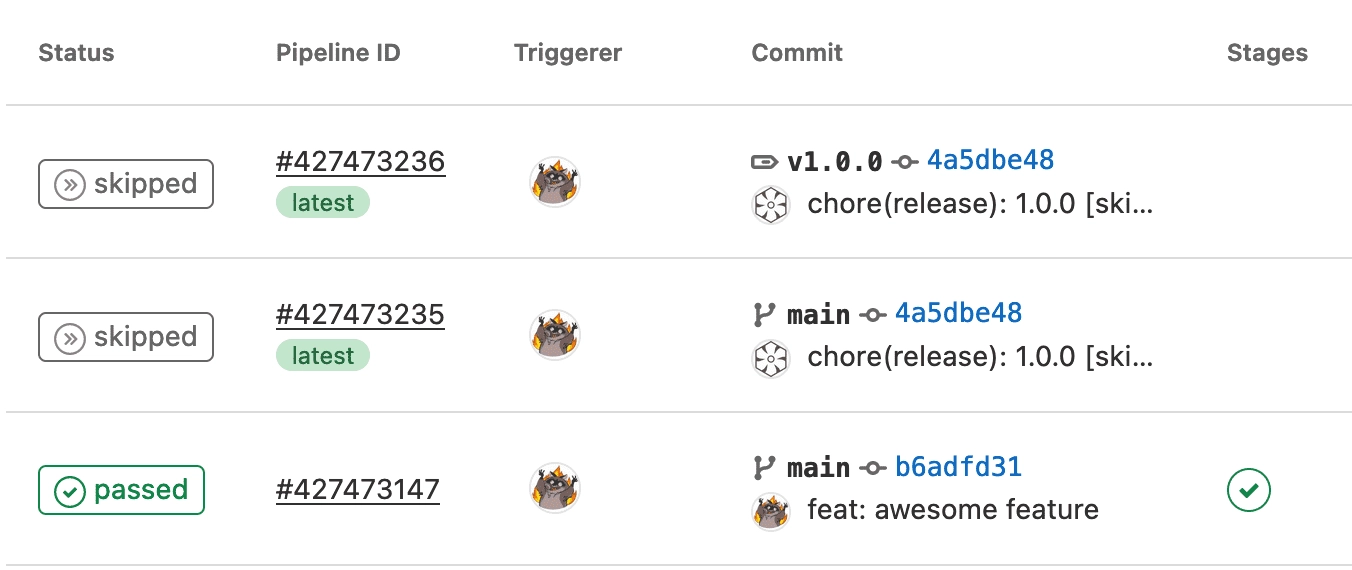
The generated tag contains the version changelog.

And the CHANGELOG.md file has also been updated with the version content.
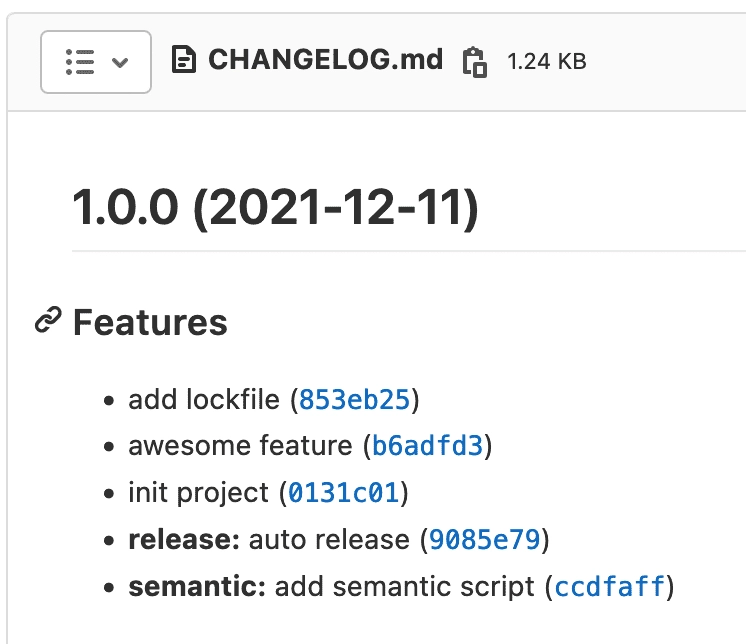
Thats it !!! 📦 🚀
Project example
You can retrieve and fork the complete project here : https://gitlab.com/ziggornif/awesome-package
Useful resources
GitLab documentation :
- https://docs.gitlab.com/ee/user/packages/npm_registry/
- https://docs.gitlab.com/ee/ci/examples/semantic-release.html
Semantic release project : https://github.com/semantic-release/semantic-release
Changelog module : https://github.com/semantic-release/changelog
Semantic versioning : https://semver.org/
Conventional commits : https://www.conventionalcommits.org/en/v1.0.0/
